
Postman has been the default tool for developing and testing APIs for years. However, unless we have the paid version, the features that the tool offers to the community for free have gradually been reduced, and the recent requirement to upload our environments and collections to their cloud has made many people consider other alternative tools.
Bruno is one of those alternatives that meets many of the requirements that any developer and/or API tester asks from a tool of this type:
- It works offline (collections and environments are stored in the file system)
- Its interface is very way similar to Postman
- It offers a CLI similar to Newman
- Additionally, it adds a layer of extensibility that will delight any backend developer and API tester
Installation
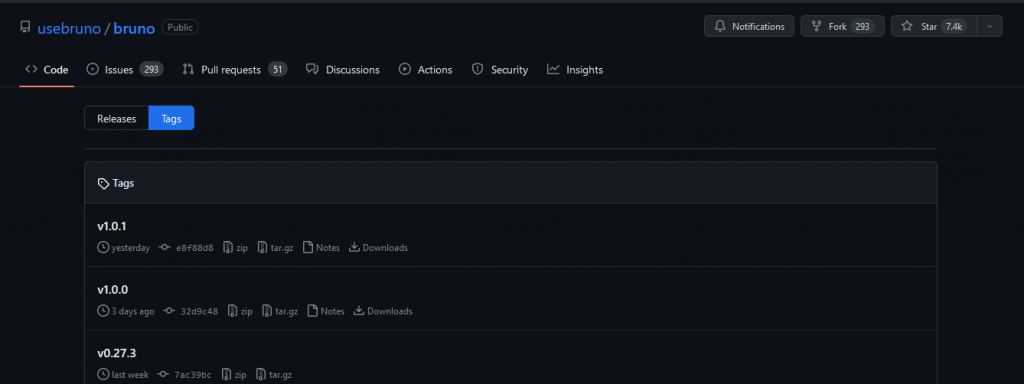
The installation of Bruno could not be simpler. Just go to its GitHub repository and download the desired version. We have clients for Windows, Linux and Mac, so we can use it on any platform.
Once installed or unzipped, we will run the associated binary and we will find an interface that will be quite familiar, except for the presence of a cute little dog as the application’s pet:
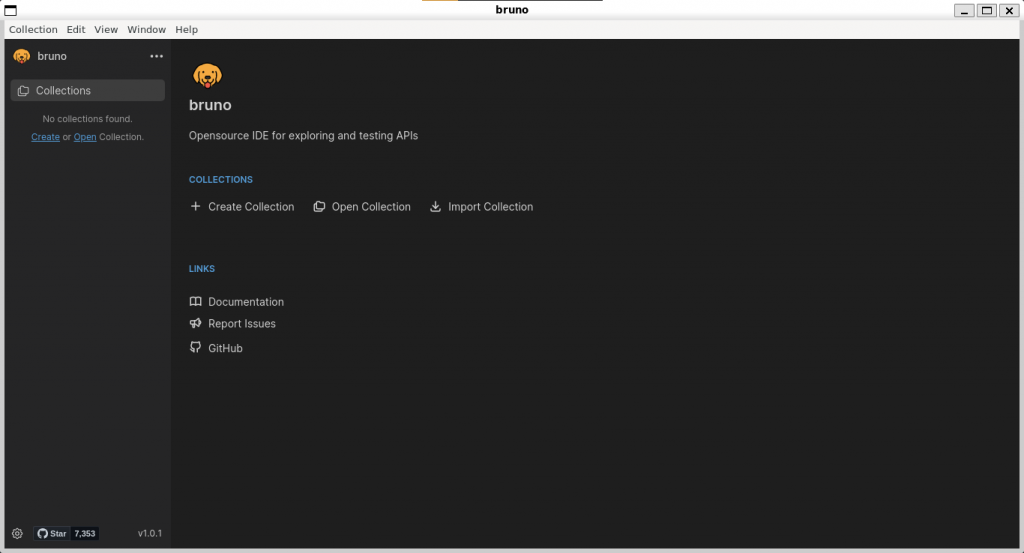
Collections
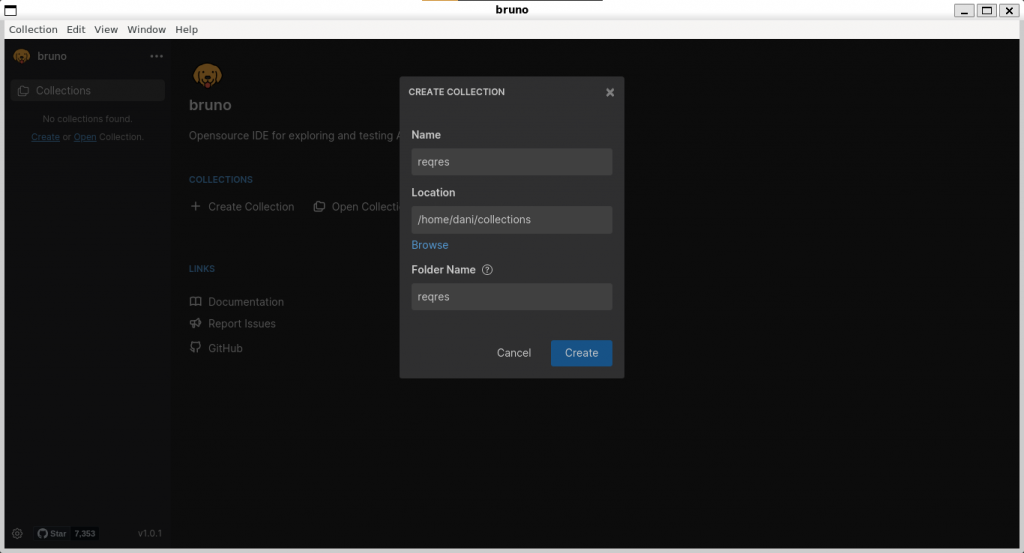
Creating a collection is as simple as clicking on the [+ Create Collection] button. This will display a popup where we will fill in the following information:
- Name of the collection
- Path where we want to store the collection (all data is stored in the filesystem)
- Name of the folder in which we will store the collection.
The fact that the collection is stored as a directory tree has other advantages, such as the possibility of creating a git repository with our team members in which to store our collections.
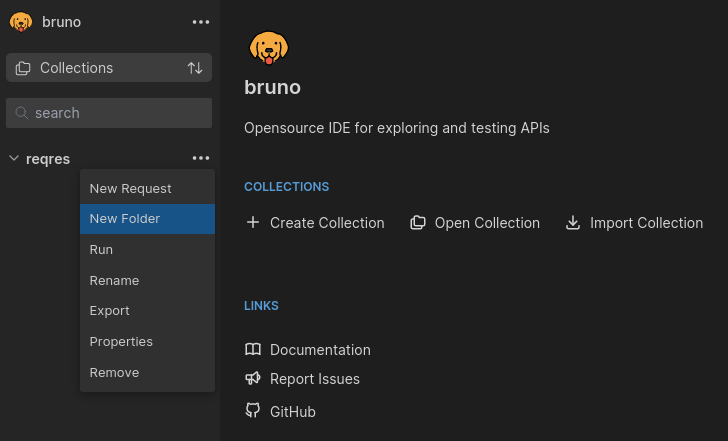
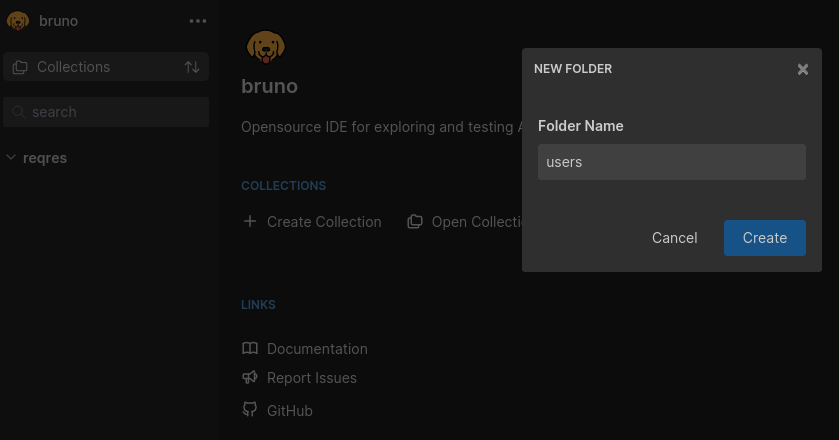
Within our collection we can also create folders. In our collection, we click the [···] button and select the [New Folder] option.
Now we assign the name we want
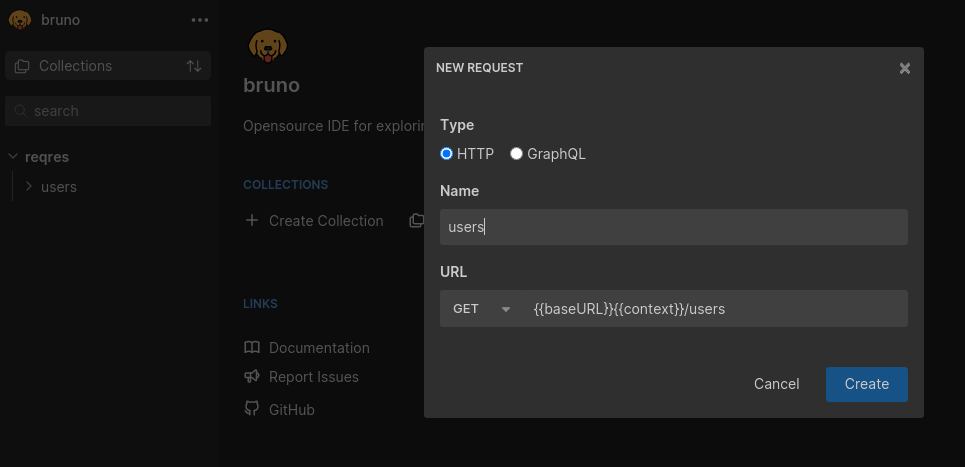
And with this, our folder is ready to create a request. To do this, select the folder or collection in which we want to create our request and press [···] and then, [New Request].

Bruno allows us to make two types of requests: HTTP or GraphQL. We select the type we want, assign a name and fill in the request type and the URL where the endpoint is located.
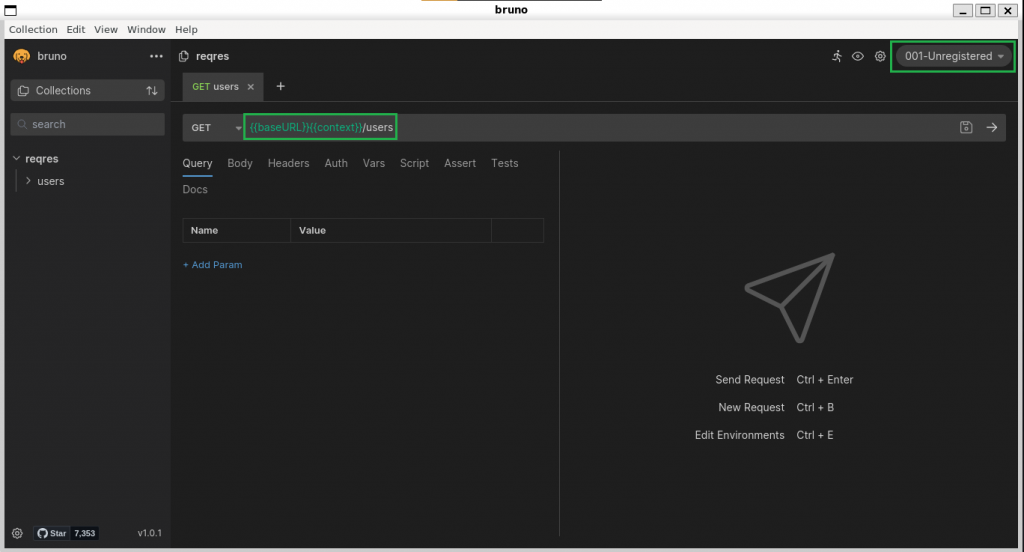
Of course, our requests can also be stored in variables, and the syntax is similar to Postman, enclosing the variables in double braces ({{variable}}):
Environments
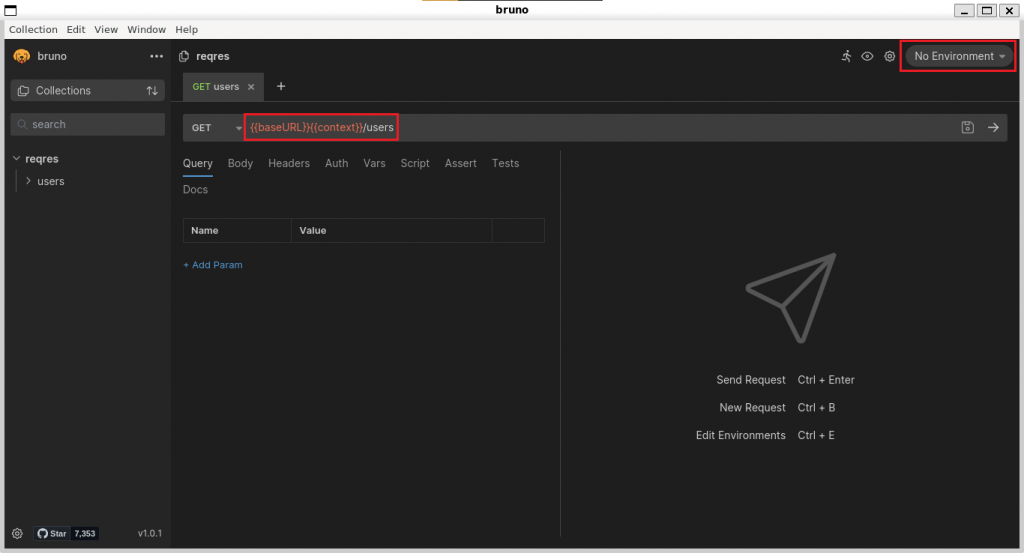
When creating a request, we see that the variables are highlighted in red. This is because the variables still do not exist. To do this, we will create an environment in which we will store them, and to do this we will go to the drop-down menu in the upper right corner:
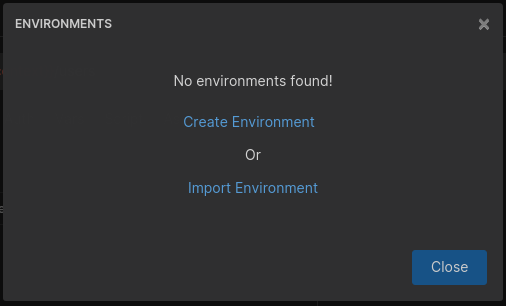
Select the option [Configure].
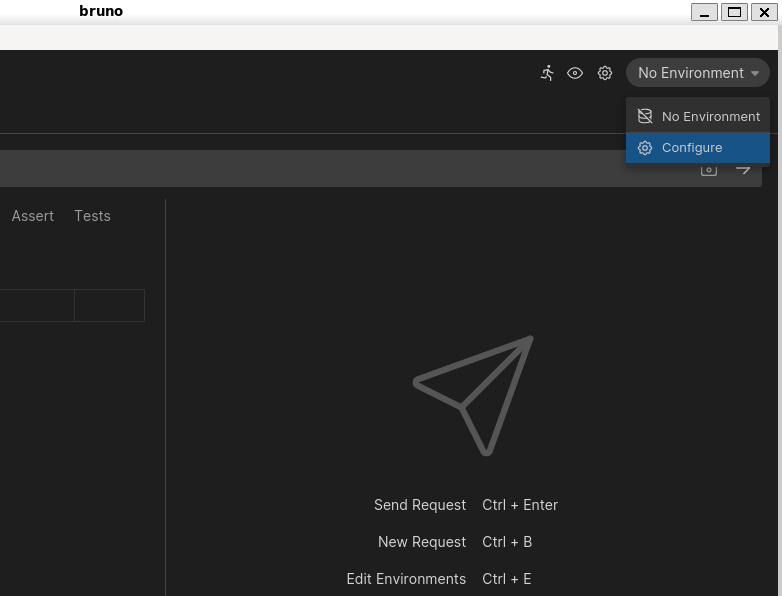
We have the option of creating a new environment or importing an existing environment. Let’s choose to create it, selecting [Create Environment]:
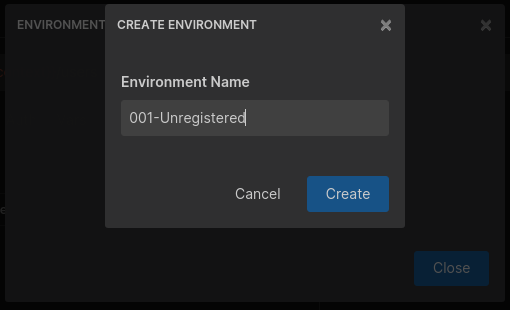
Assign a name to our environment:
And finally, we create our variables and assign them the desired values.
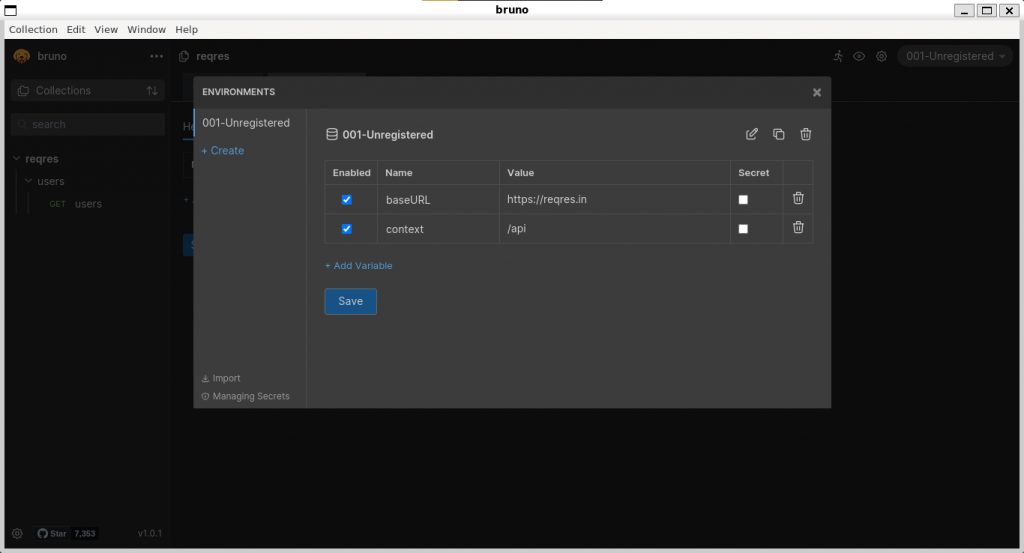
Once this is done, the variables will appear in green color and the selected environment will be shown selected in the drop-down in the upper right corner.
Requests
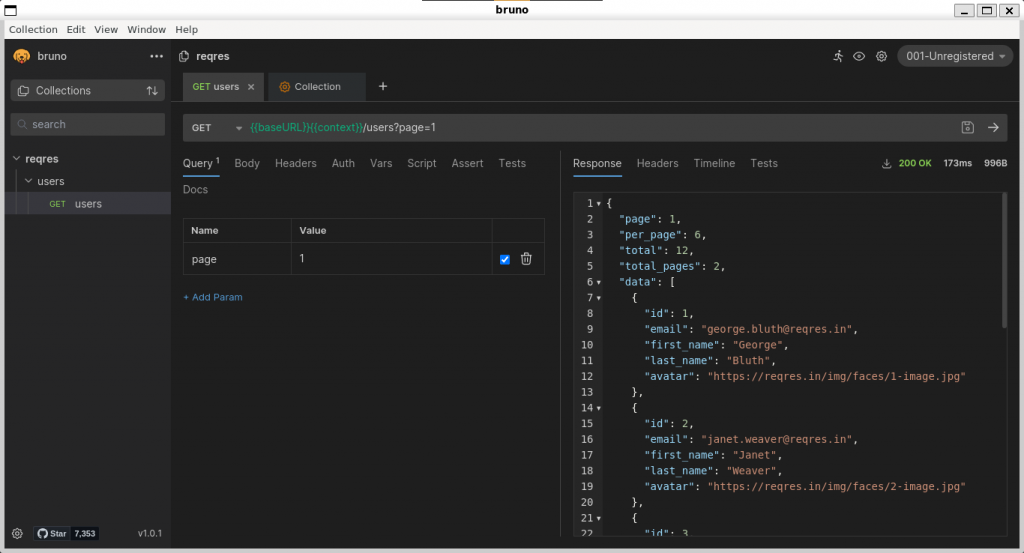
The process of coding requests is very similar to the one we used in Postman: depending on the type of request we can set the parameters in the query or in the body. And by pressing the arrow [->] next to the request URL, we can send the request to our endpoint and get the result on the right side of the screen. As we can see, the interface is quite familiar:
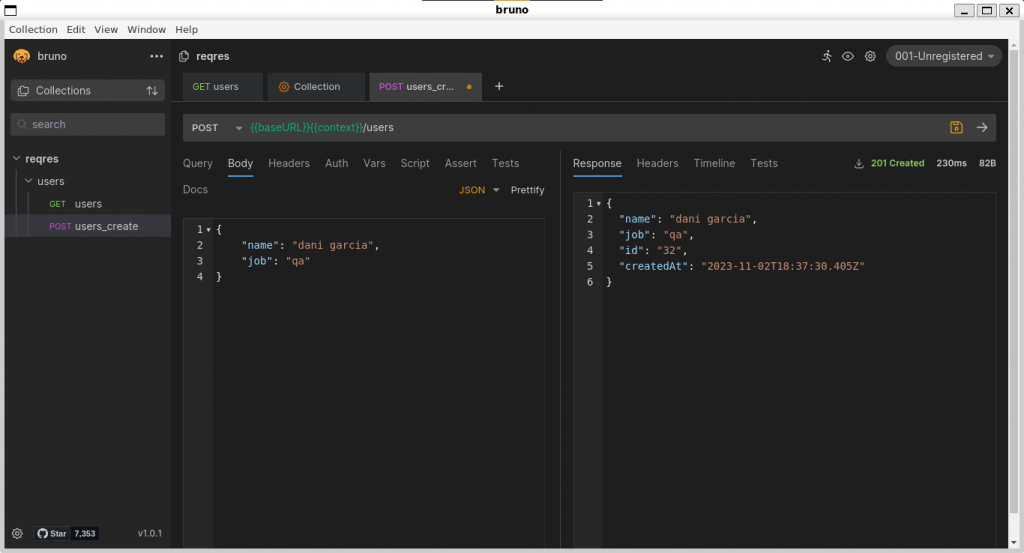
When sending a POST request, we can edit the request body and select its format (Multipart, URLEncoded, JSON, text, …). We can also edit the headers, just as we would do with Postman.
Variables
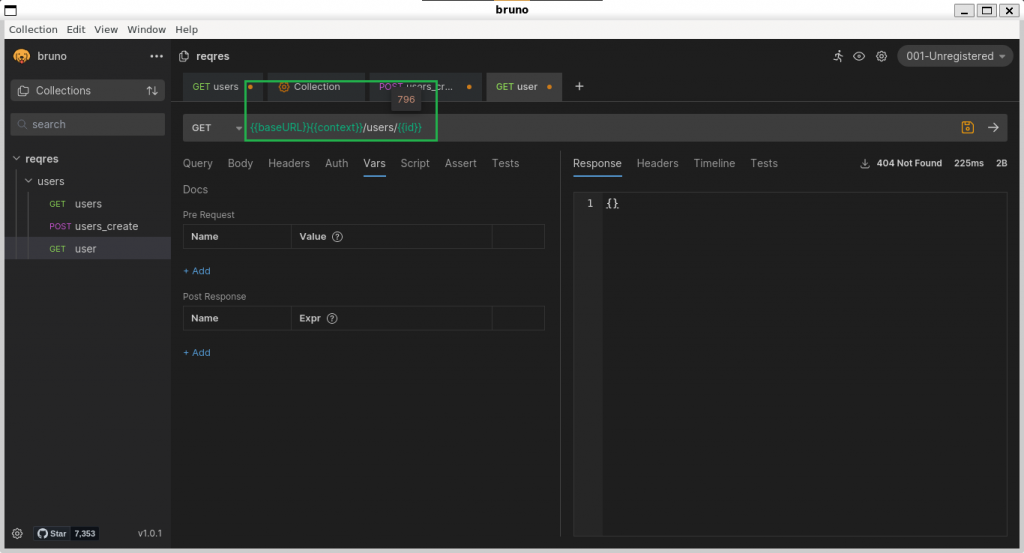
As an interesting feature, Bruno allows us to assign variables before or after the request without the need to explicitly code them in a script. For example, let’s assume that we have an endpoint in which we access the information of a record by providing the id as part of the path, i.e.:
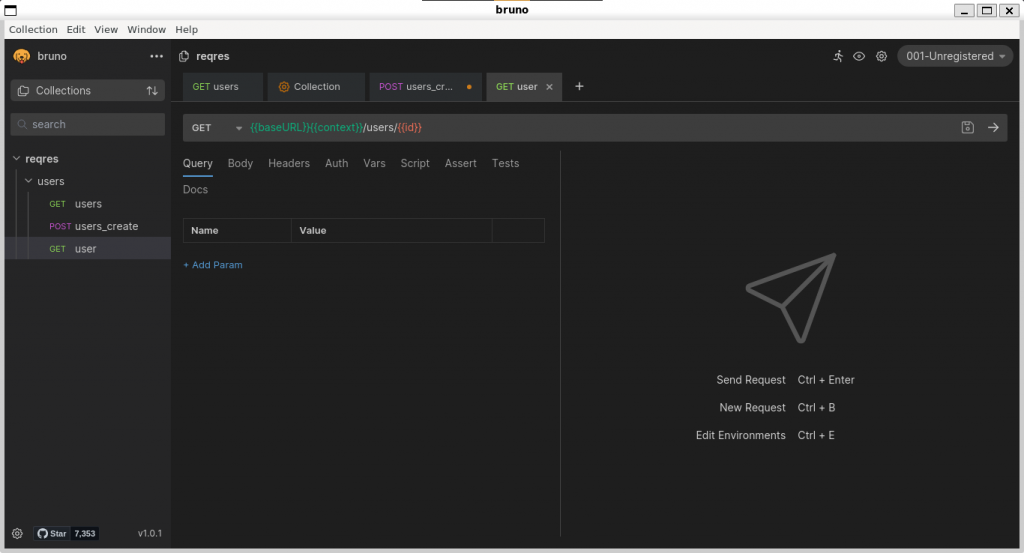
This variable is displayed in a red colour, since it has not been declared. We want its value to be the id returned by the POST request that inserts a record and returns the information stored in the database.
How can we do this? Through the global variable res.
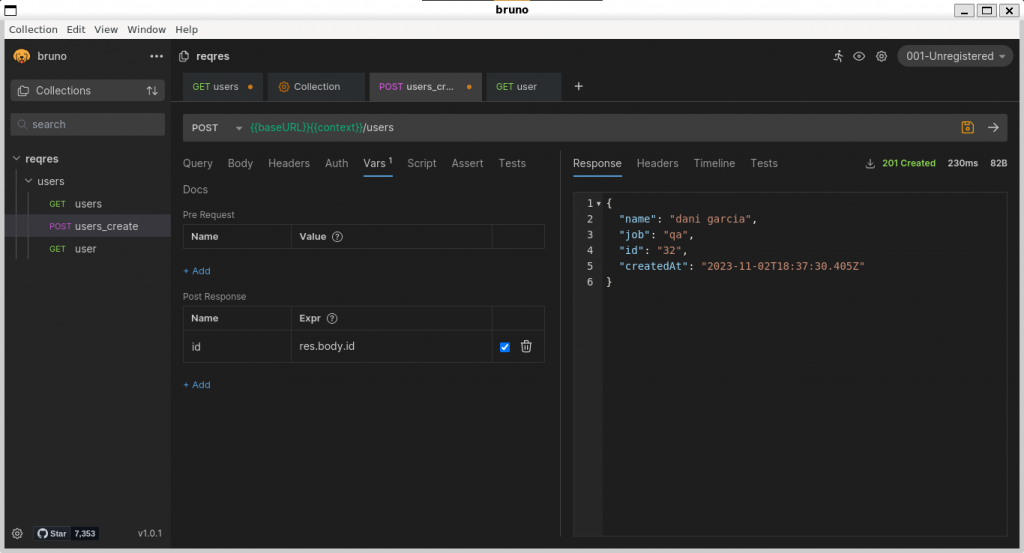
Responses
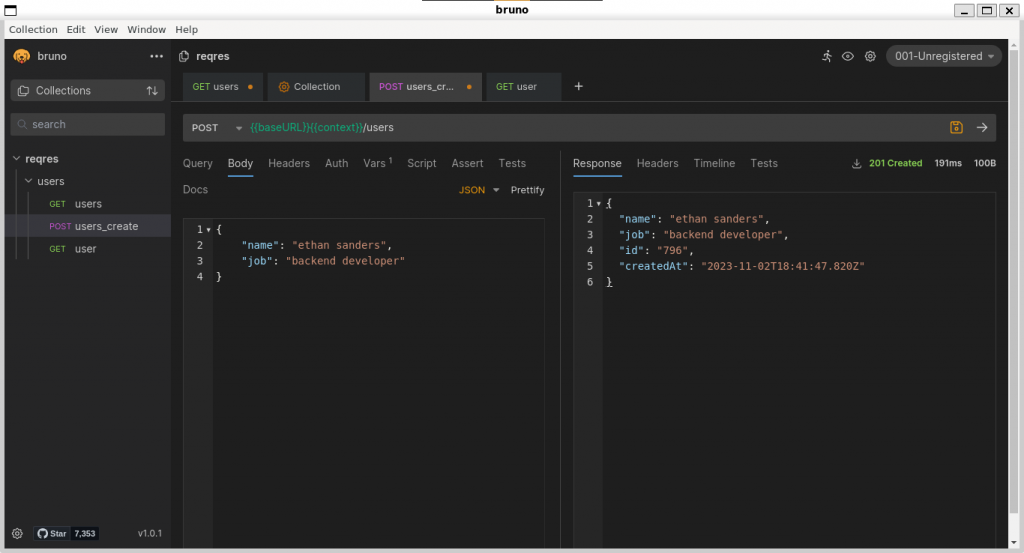
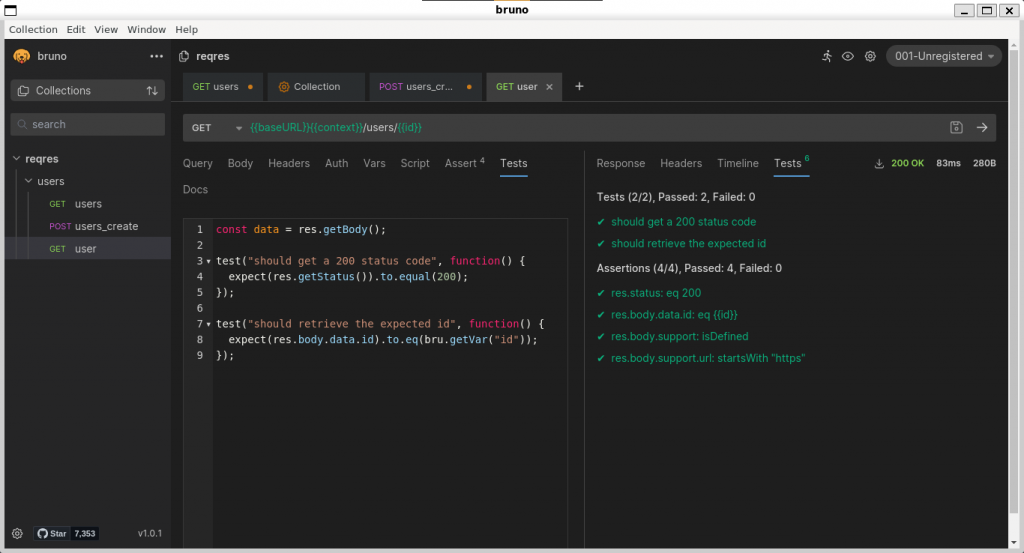
The global variable res allows us to access the response in post-response scripts, asserts and tests. To store in a variable an element retrieved in a response, we just select the [Vars] tab and in the [Post response] section, we add in the table the name of the variable and the value it should store. In this case, we want the variable “id” to be filled with the field “id” obtained in the body of the response, so the expression that will assign value to the variable will be “res.body.id“:
Let’s now try executing the POST request that inserts a record. We can see that the id with which the record has been stored in the database is 796:
If we now open again our “users” request, we can see that the {{id}} variable is now green. Moreover, if we place the mouse pointer over the variable, Bruno will show us its value, which matches the one returned in the previous request (796):
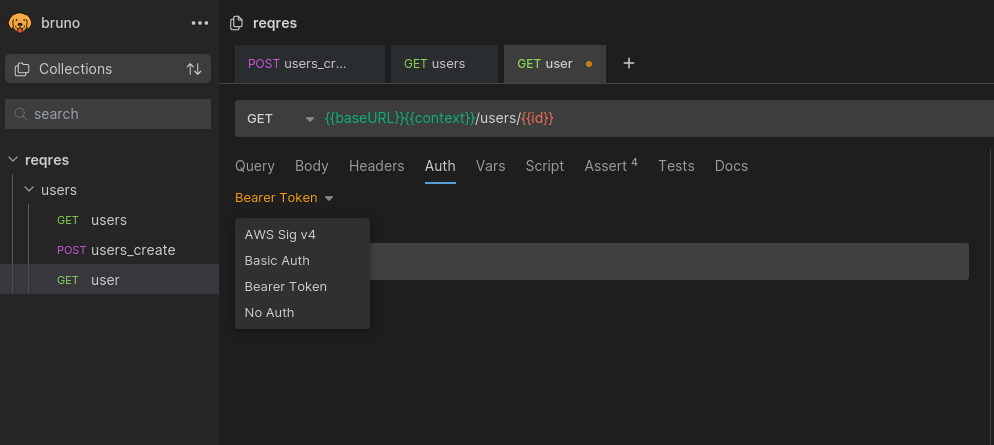
Authentication
Another feature offered by Bruno is the ability to configure the authentication of requests. As in Postman, it is possible to use variables to, for example, store a bearer token and use it later in the [Auth] tab to authenticate our requests.
Asserts
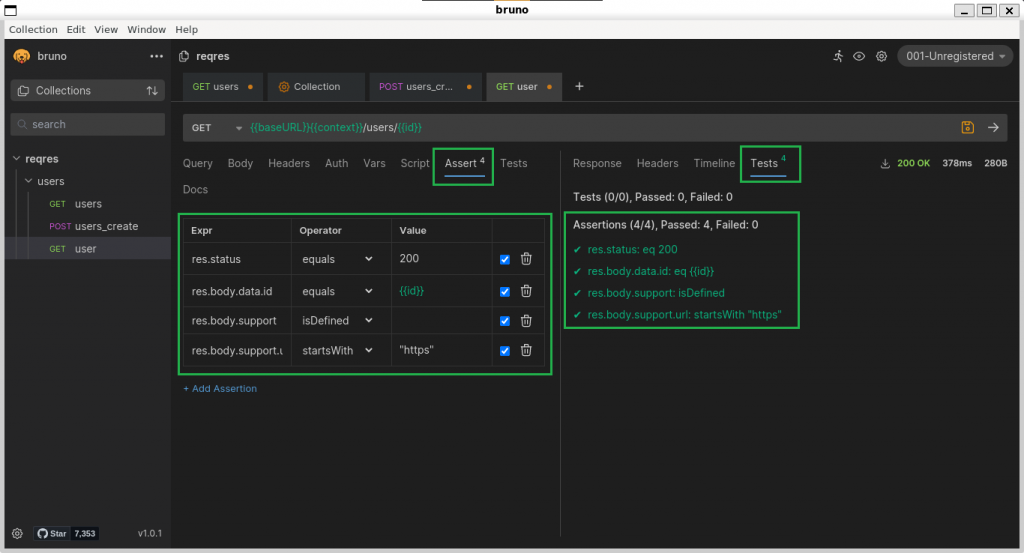
Another of Bruno’s features is the possibility of using assertions in the requests, so that we don’t have to code specific tests for it.
Assertions are useful to perform atomic checks, such as the status of a response, the presence of a field or when we expect a specific value. The asserts are executed after obtaining the response, and to do so just open the [Assert] tab and fill in the table.
- Expr: expression to check
- Operator: operator to apply to the expression
- Value: expected value
The assertions evaluate the expression and check that, after applying the corresponding operator, the expected value is obtained.
Tests
If you have used Postman before, this tab will be familiar to you. In this section we will be able to code tests in Javascript, allowing us to play with the data as we were used to. However, unlike Postman, the tests are intended only for coding tests, not for post-request code. Certainly, coding those tasks in this section was something I personally didn’t like too much, as it forced the user to mix two different tasks.
Therefore, if you need to perform tasks that have nothing to do with testing after the execution of a request, it is advisable to do it in its corresponding section ([Script] > [Post Response]).
Bruno also offers the global variable “bru“, which acts similarly to how “pm” works in Postman by offering an interface to interact with the environment. The tool’s documentation provides a list of available methods and functions, such as reading and saving variables and other similar tasks.
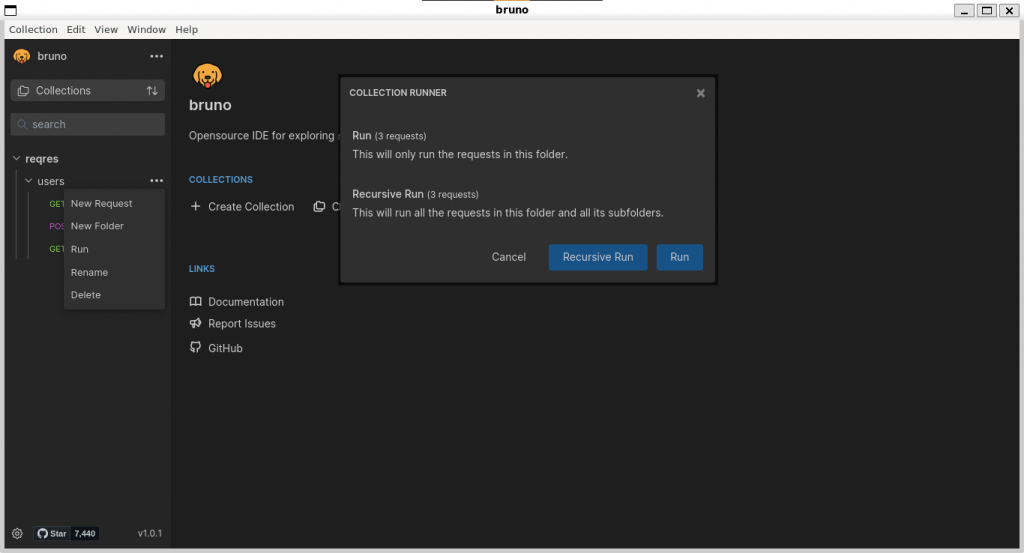
Collection Runner
One of the features that Postman limited some time ago was the possibility of running complete collections or folders. Bruno allows you to do this without any restriction, and in two different flavors:
- Execute a collection: executes the requests of the current folder, but not those of the subfolders.
- Execute a collection recursively: executes all the requests of the current folder and those of its subfolders.
To make use of this feature is quite simple: just click on the [···] button of a folder and select the [Run] option. This will open a popup that will allow us to perform one of these two operations:
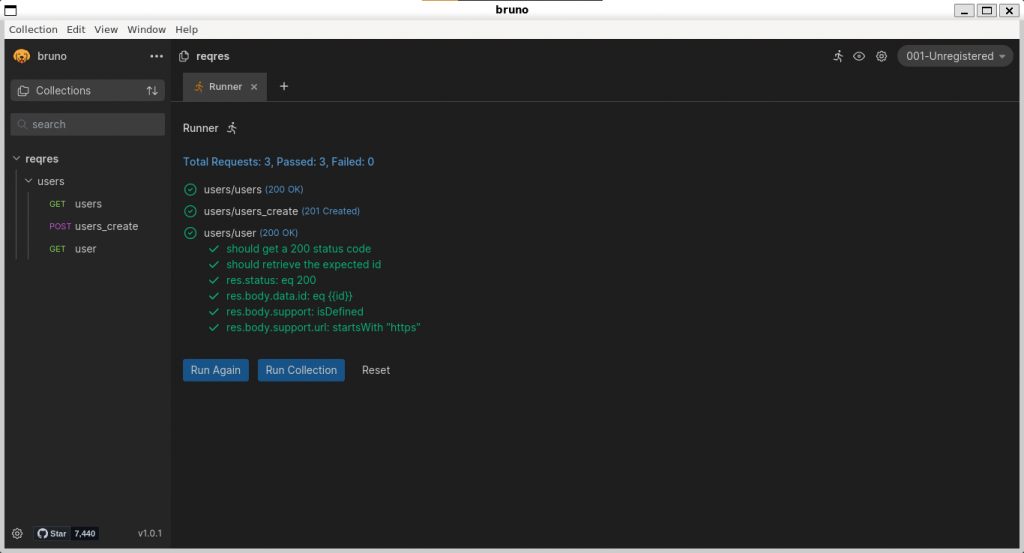
The result of the execution will be displayed in the “Runner” tab:
Extra ball: extensibility
I leave for the end one of the features of Bruno that I have loved the most: its extensibility.
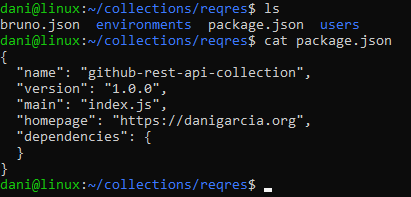
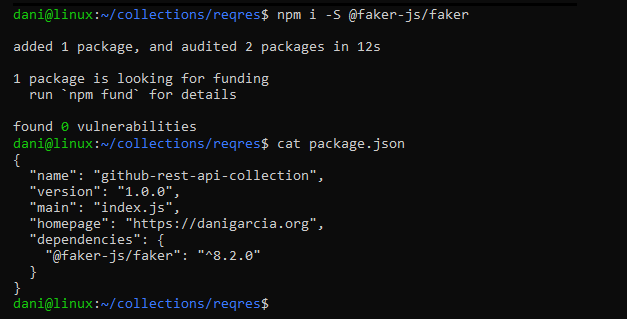
Bruno allows us to use any npm package within the environment. Yes, ANY npm package. To do this, it is as simple as accessing the folder where our collection is located and initializing an npm project or creating a package.json file:
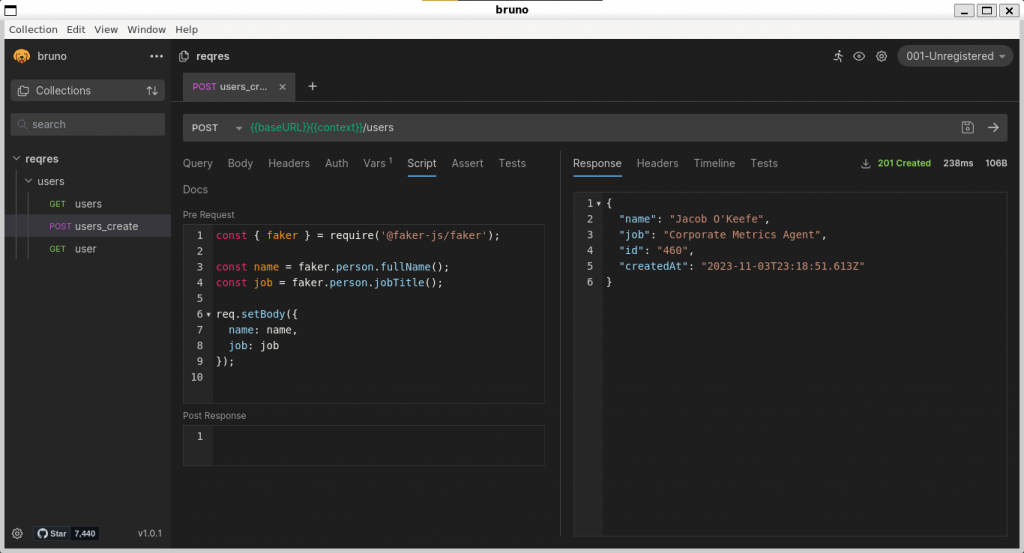
Once we have our project initialized, we will install packages as if it were a node project. For example, we will install the @faker-js/faker package to mock data in our requests:
Finally, inside the [Script] tab we will import and use the packages we have imported in the normal way. In this case, the global variable “req” allows us to interact with the request before sending it.
Besides that, you can edit the collection file bruno.json and add support for features like access to the filesystem or whitelist packages like form-data:
{
  "version": "1",
  "name": "MyCollection",
  "type": "collection",
  "scripts": {
    "moduleWhitelist": ["form-data"],
    "filesystemAccess": {
      "allow": true
    }
  }
}
In this GitHub discussion you can find out some tricks and howtos about how to make additional magic with this amazing tool, like uploading files or implementing an automatic OAuth2 authenticator before executing a request. It worths a try!
More information:
- Bruno homepage
- Bruno git repository
- Bruno documentation
- Bruno Scriptmania (recipes and code snippets for Bruno)